 slowscript
Articles
Projects
About me
slowscript
Articles
Projects
About me
HTTP File Server
HTTP File Server is a simple tool that allows you to access your phone’s files from a desktop, tablet or other devices without any special software - just a web browser.
It also supports WebDAV, so you can use any WebDAV client to manage files more efficiently.
Features
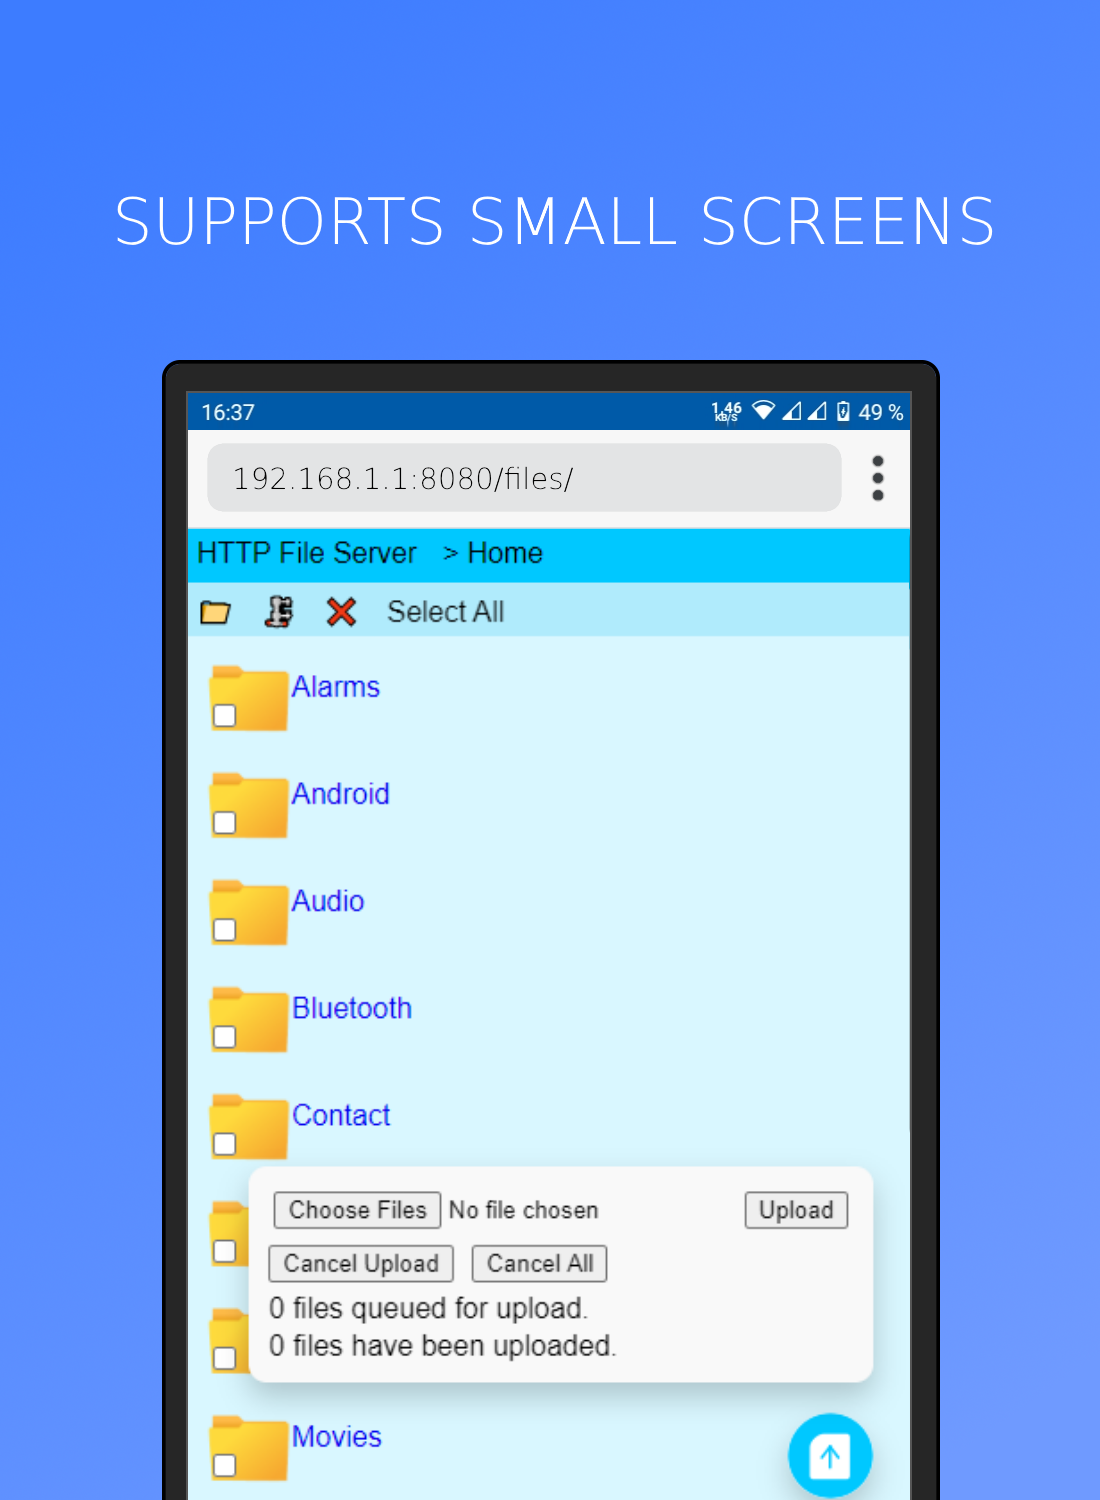
- File manager-like web UI that can adapt to smaller screens
- Download individual files or a ZIP archive
- Upload multiple files in a queue, create directories
- WebDAV server, supports any WebDAV client
- Mount as a network drive in Windows (see instructions)
- Option to serve static HTML files
- HTTPS encryption with self-signed certificate, or…
- Import your own custom certificate if needed
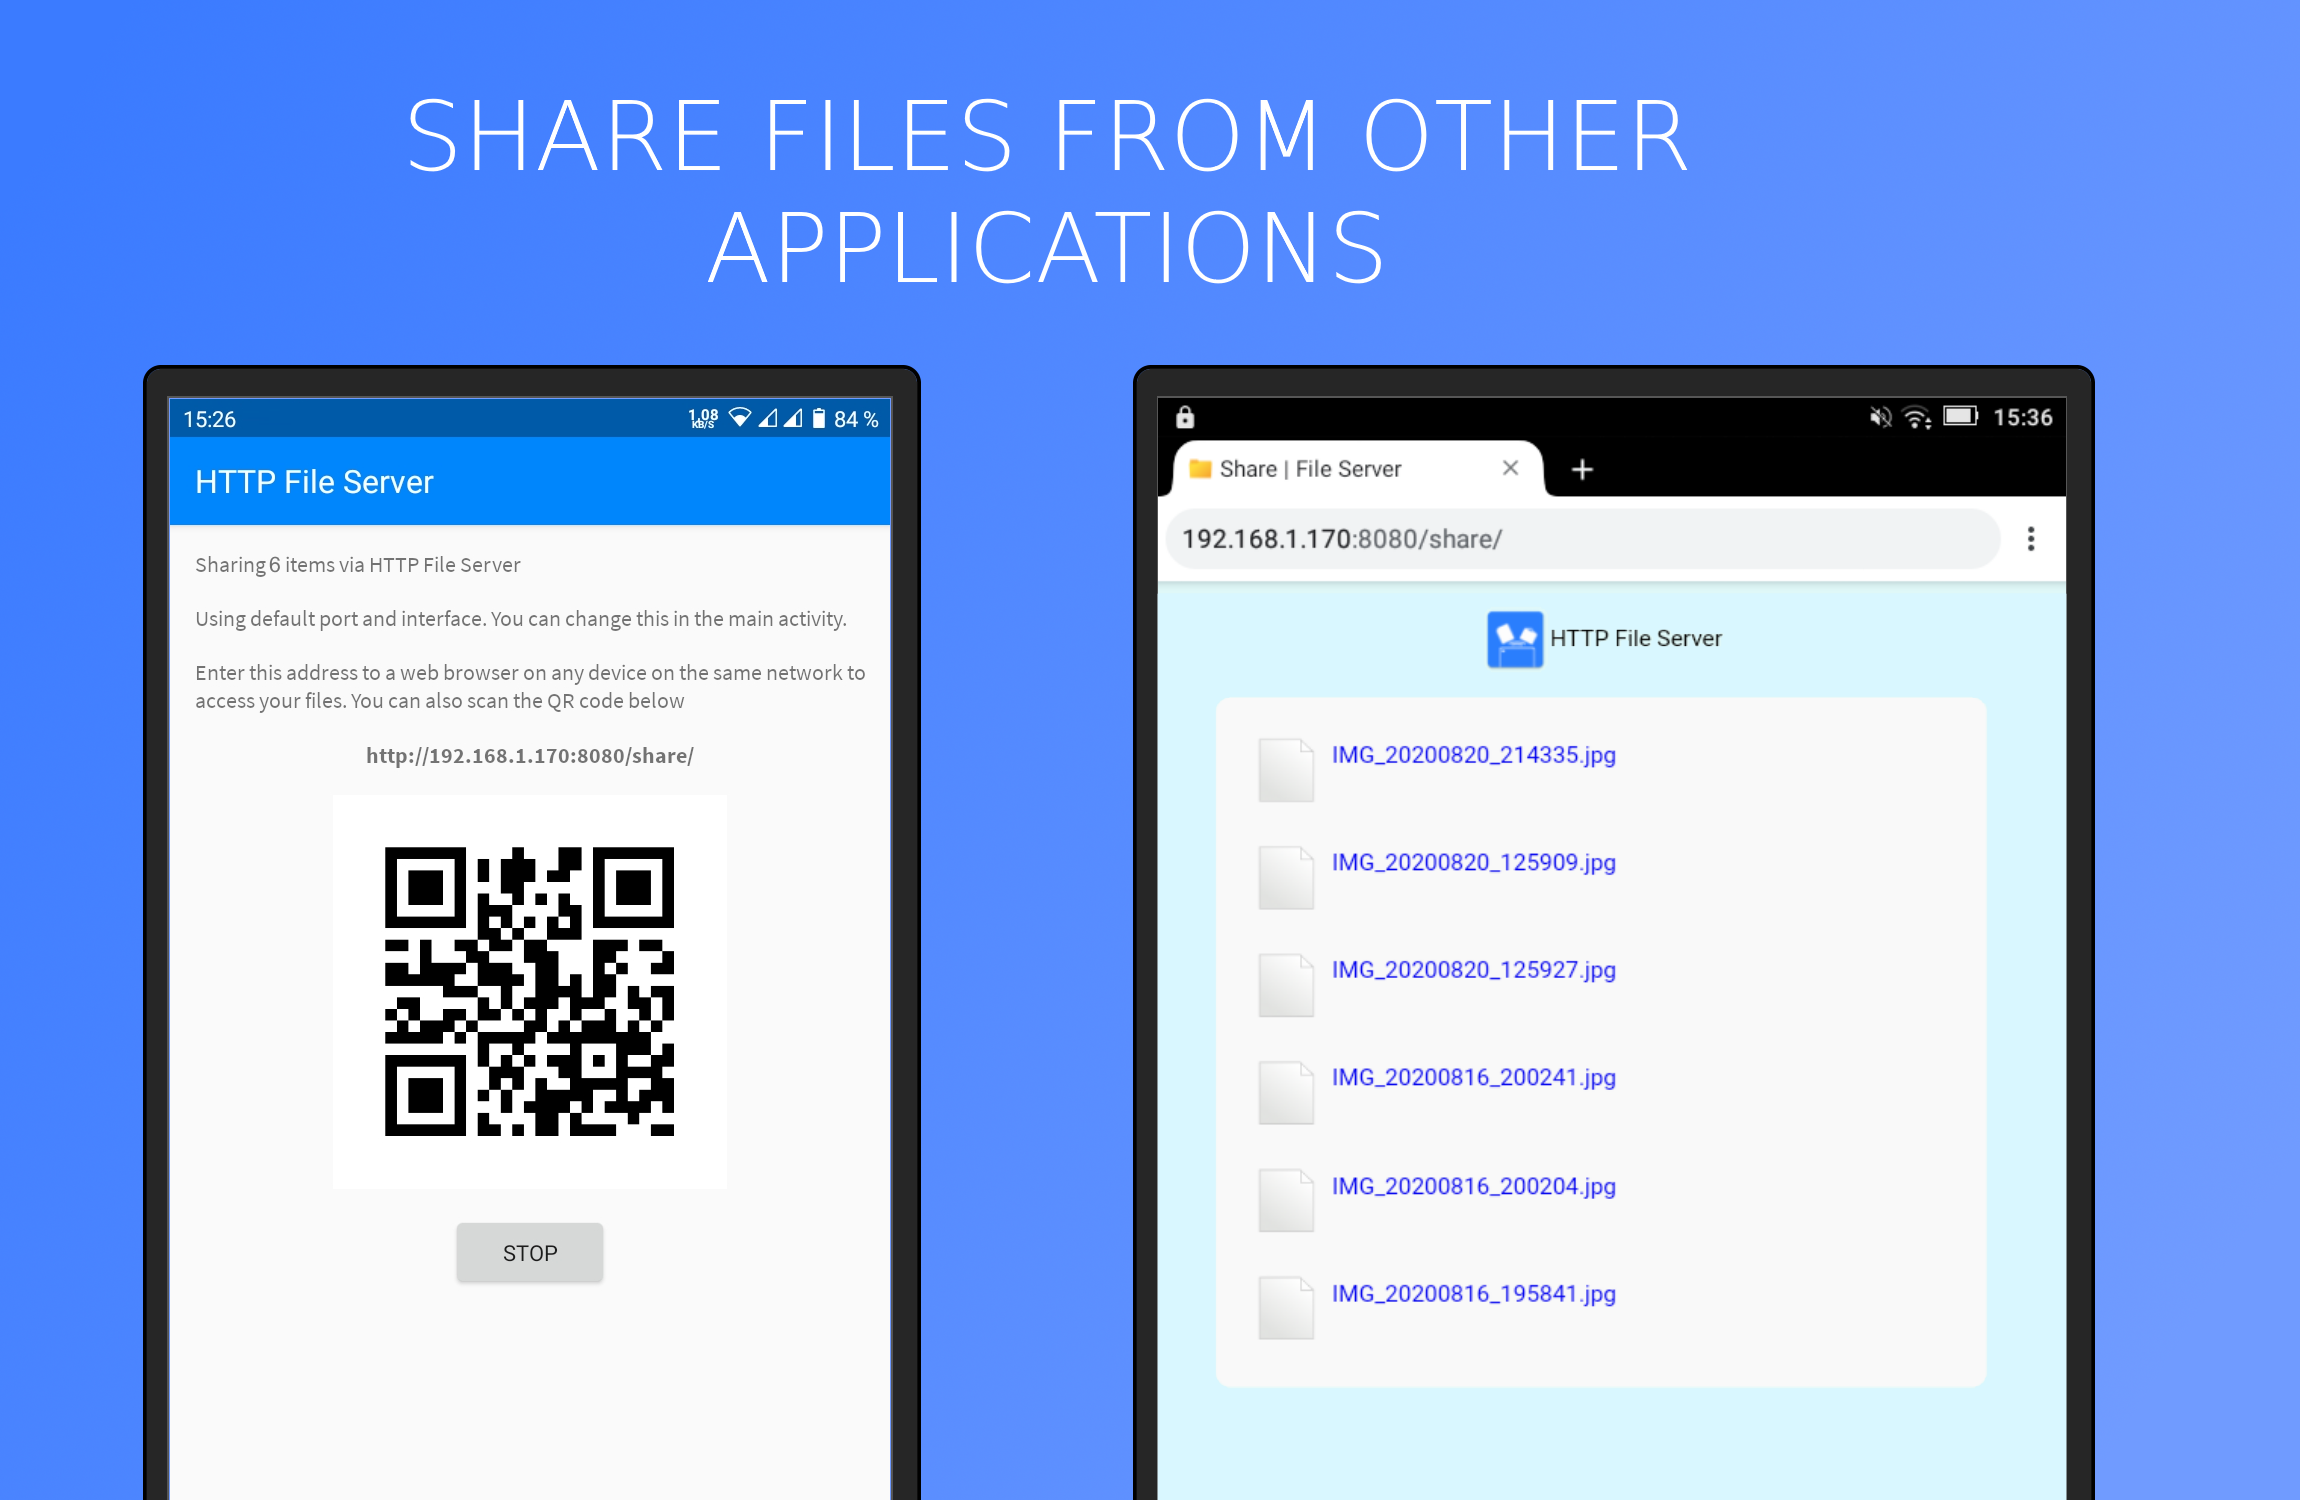
- Supports sharing files from other applications
- Option to restrict deleting/overwriting
- Supports basic authentication
- Tiny size (<5MB)
- Only basic permissions required
Extra PRO features:
- Run in background
- Drag & drop to upload and move
- Image previews
- Images open in gallery view
- More display options (list, large previews)
Pro is available as a one-time in-app purchase
![]()


Security
This section is not yet ready (WIP)
HTTPS
With HTTPS enabled all data transferred between the server and client are encrypted. However in order to have a truly secure connection the server has to authenticate itself with a certificate that can be verified by the client (it has to be signed by a known root certificate). That means either the operating system or webbrowser has to have the root certificate in its certificate store. Regular certification authorities whose root certificates are included in most installations don’t issue certificates for local networks, so we will need to create our own root certificate and import it into all the clients.
The server currently generates its own root certificate (one per device) and uses it to sign certificates for each IP address the server is started on. The clients don’t recognize the signer and show a warning (rightly so). This doesn’t matter in most cases the app is intended to be used (home WiFi, only family members connected). You can either ignore the warning, or use the proper solution described below. You can also verify the certificate yourself by comparing the fingerprint shown by the app and the one shown by the webbrowser (under certificate details, padlock icon next to address bar, see screenshot). If the strings match, the connection should be secure and you can add an exception for that server.
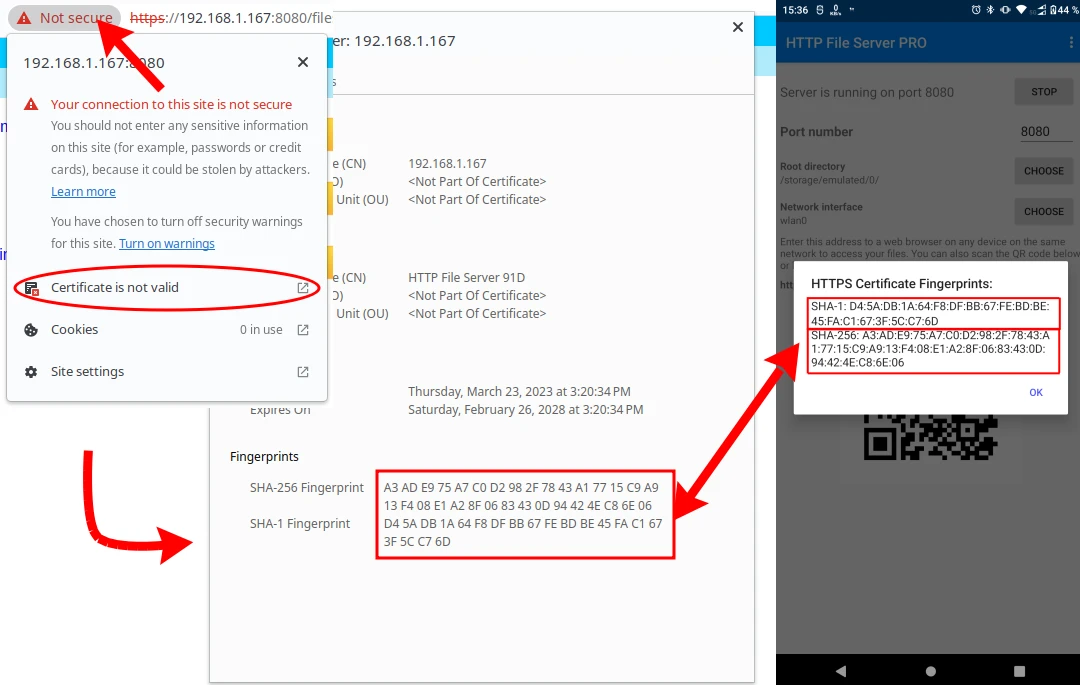
Managing certificates
If you want to avoid the warning as described above, you will have to export the root certificate from the app and import it into the OS or web browser before accessing the website. First export the certificate using the “Export certificate” button in the 3-dot menu. You will be asked where to save the .pem file containing the root certification authority specific to your phone. Then you need to securely transfer this file to the devices you are connecting from.
Importing into Windows: Open certmgr.msc, select Trusted root cerification authorities, right click → All actions → Import. Switch the filter to All files and select your exported .pem file.
Importing into Firefox: Open Preferences → Privacy and security → Security → Show certificates. Switch to Authorities tab and click Import.
Importing into Chrome: Open Settings → Privacy and security → Security → Manage certificates. Switch to Authorities tab and click Import.
It is also possible to use a custom certificate that you create yourself. You will need the certificate and corresponding private key encoded as two .pem files. Simply tap onto Custom certificate in the 3-dot menu, then Import certificate in the dialog, select first the certificate itself and then the key. If you no longer use this certificate, tap Custom certificate in the menu and select Reset to default. The server will return to using self-signed certificates.
Authentication
HTTP File Server implemets basic authentication for both web UI and WebDAV. Always use this together with HTTPS to prevent an attacker from capturing your credentials. You don’t have to set a username. If you leave it empty, the server will accept any user as long as the password is correct.
Digest authentication
Since 1.5.8, it is possible to enable experimental support for digest authentication (wiki) in the settings in case some client requires it. Digest authentication is slightly more secure than basic as it sends the credentials in hashed form, although it is still strongly advised to use with HTTPS.
FAQ
How to access the SD card?
Android <= 4.4: When selecting root directory, tap “../” until you get to :HOME, then select your card and it should work as expected.
Android 5…10: The above still works, but read only. Enable “Access external storage (with SAF)” in the settings which will switch the method used to access the file system. Then you need to reselect your root directory, this time the system picker will open instead. Open the side panel and select your SD card. Now you’ll have read and write access in the directory you’ve selected. The drawback is that this mode is limited and some features don’t work (download ZIP, static mode…)
Android >= 11: a) Enable “Manage all files” premission, use the regular picker as before with “Access external storage” off.
b) Without the permission, “Access external storage” will be necessary for even internal storage to work.
How to upload a folder?
Folders can be uploaded via drag&drop (Pro feature). Alternatively you can use any WebDAV client, many of which are free.
Can the app be used to serve web pages?
Yes, just enable “Static mode” in the settings and set the correct root directory.
Can the app be used as a public server?
It should be possible to run it as a public server as long as the device has a public IP address or (preferably) you have port forwarding set up on your router. This is no different than any other server application and you can learn more about this online. The only caveat is that the server itself cannot use the standard ports 80 and 443 (both require root privileges) but port forwarding can work around this.
It is however strongly discouraged to do this unless you have experience securing it against attackers. An Android device with a public IP address may also be more vulnerable than a regular Linux server - another reason why port forwarding is better. If you just want it to serve regular web pages and not the file browsing interface, enable “Static mode” in the settings. If you want to expose the file browser that allows making modifications to the filesystem, please enable (and follow the instructions on properly using) HTTPS and Authentication for security. But again, be sure you know what you are doing!
How to connect with Windows Explorer (WebDAV)?
Using an alternative client like WinSCP works much better IMO, but since many people want this…
Open the Map a network drive dialog and enter the address that is shown in the app exactly how it is (starting with http://, don’t care that it suggests the \\server\... format). You can also paste the same address into the Windows Explorer address bar and it will work without mapping a drive letter. If you like the command line, this will also map the WebDAV server as W:
net use w: https://your.ip:port/files/
In case writing the plain http: address doesn’t work, try \\your.ip@port\DavWWWRoot\files/.
Please note that this is buggy sometimes. That happens when the connection fails once and then Windows will simply refuse to communicate with the server (it receives no requests even though Windows will show that it is loading). This can be fixed by rebooting Windows most of the time. It is a good idea to check that the web version is working before trying this.
If you want to login with a username and password, you need to enable HTTPS as well (Windows seems to enforce this). For HTTPS to work, you need to export the certification authority from the app and import it into Windows. Otherwise the connection will not be authenticated and will fail (unlike in the browser where you can choose to trust individual certificates).
Important: To enable uploading, you need to enable overwriting too. Windows will first create an empty file and then write over it. When overwriting is disabled, you will not be able to upload anything. Also, Windows has a large overhead when uploading many small files. If this is a problem, please use a different client.